Recalculating SLAs
By default, a ticket is evaluated against all active SLAs and is assigned an SLA when the ticket is created. Depending on your organization's workflow, it may also be necessary to repeat this process over the course of the ticket's lifetime.
For example, consider your Change team is reviewing all new Change tickets in order to prioritize and assign the tickets. The requester of the Change may have prioritized a ticket as having an Impact of Major; however, the Change team changes the ticket Impact to Significant.
Assume there are two different SLAs: one SLA for Major Impact tickets and another SLA for Significant Impact tickets. You could elect to Recalculate SLAs after the Change team performs the Accept action for a ticket in the Assignment state in order to apply the correct SLA to the ticket.
The elapsed time for the ticket is included in the SLA upon reassignment. For example, a ticket is submitted with an Impact of Major and an eight (8) hour SLA applied. An hour goes by and the Impact is changed to Significant, which has a four (4) hour SLA. The SLA time remaining is recalculated to three (3) hours.
You can view the Assigned SLA as well as when the SLA was recalculated in the History section.
To enable SLA recalculation, you must adjust the workflow configuration in Administration > Design Studio > Workflows. This requires saving the current workflow as a new workflow, making and publishing changes, then assigning the new workflow to specific tickets or setting it as the new default workflow.
To trigger an SLA recalculation:
-
In Design Studio, click All Apps, or navigate to the desired app (i.e. Incident, Change), then select Workflows.
-
Double-click the row of an existing workflow to modify. The Workflow Designer displays.
-
Save the workflow as a new workflow.
-
From within a workflow State, click a workflow Action (i.e, Submit, Accept, Resolve) to display the Action Properties.
-
Under Settings, select the toggle to enable the Recalculate SLA option.
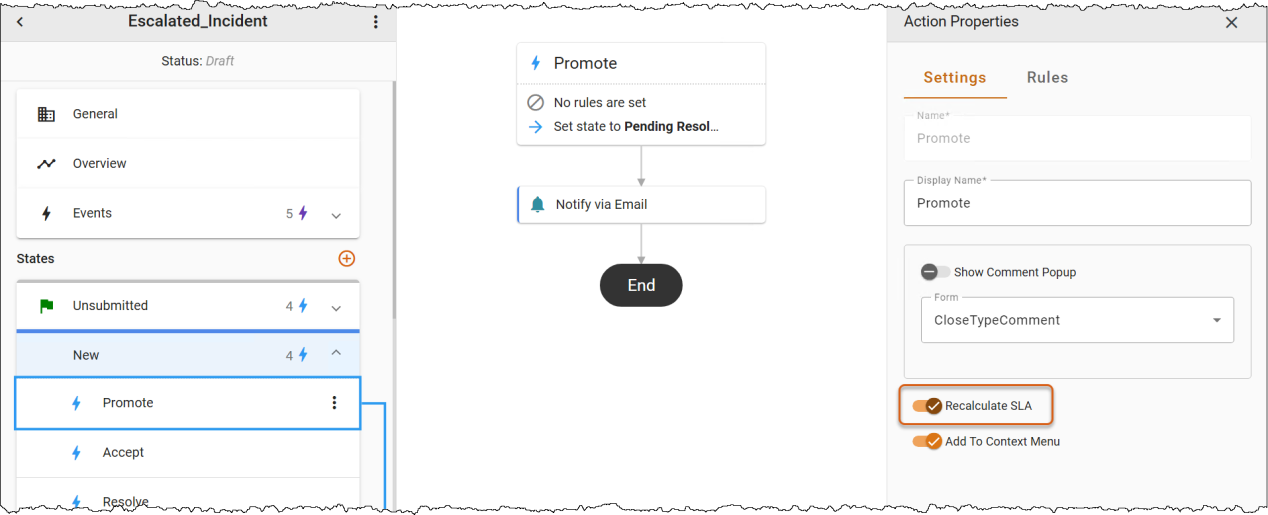
-
Click the three-dot menu next to the workflow name (i.e., Escalated_Incident). Publish the workflow to save your changes, then assign it to a ticket or set it as the default workflow to enable the SLA recalculation.
For more information on editing workflows, refer to the Workflows topics in Administering ChangeGear Web > Design Studio > Workflows.